Check out the new button I just put on my blog . 23 Day Frugal Living Challenge! Go sign up and take the challenge of living frugally for 23 days. I'm excited. It starts Friday, January 6, 2012. Here are a few ways we will challenge ourselves:
~Redefine "enough"
~Learn how to use a 30 - day list
~Stop the impulse buys
~Grow a garden
~Cook ahead
~And much more.......
Go check it out.
Dana
Wednesday, November 30, 2011
Tuesday, November 29, 2011
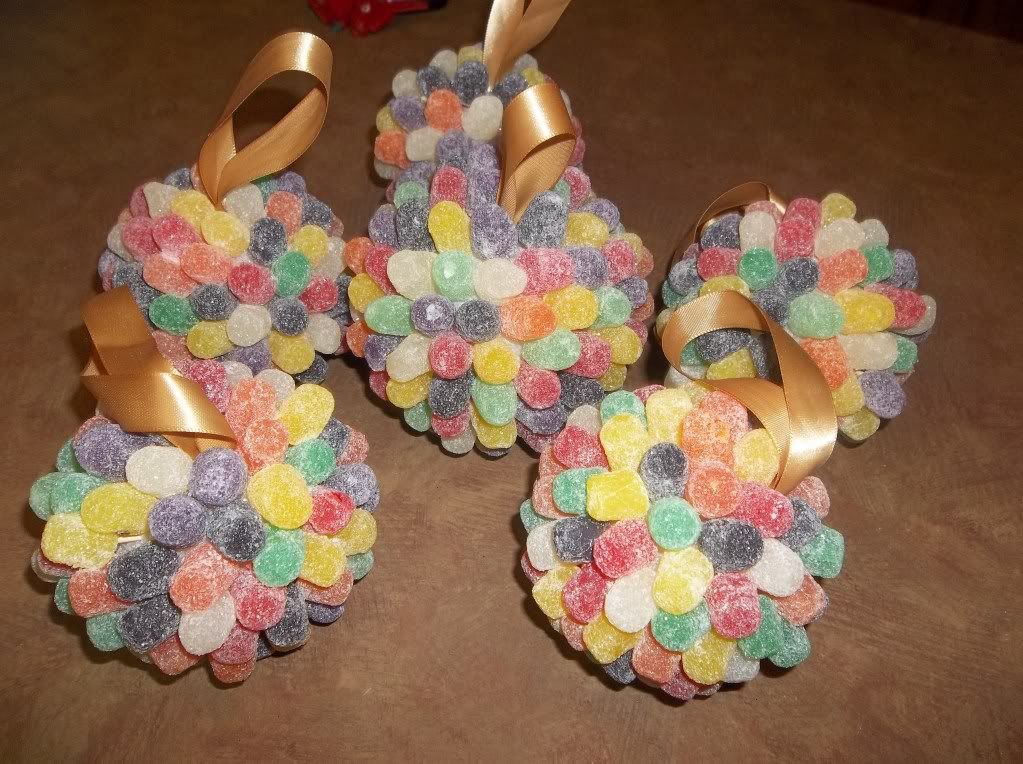
Homemade Christmas Ornaments
The day before Thanksgiving we all decided to make these cute Christmas ornaments.
Every month in our homeschool group, the girls and moms get together for the Keepers at Home meeting. Its alot like girl scouts but more Christ-centered. For mothers, I believe its the most important time in our lives, THE most important time God has given us to teach our girls about our Lord Jesus Christ, about one day being a Christian woman and being prepared to be a wife, a mother, and how to manage a home. Being a "keeper at home" is a very enjoyable, sometimes hard and very worthwhile job.
A few weeks ago, I was suppose to teach the girls something new at our meeting and our whole family came down with a stomach bug and we had to cancel. So, the other day, we decided to make these little ornaments for our family to enjoy for Christmas this year. We gave each grandmother, aunt and great-grandmother one. They are really easy to make. We came across the idea in this Martha Stewart Christmas Book entitled "Parties and Projects for the Holidays".
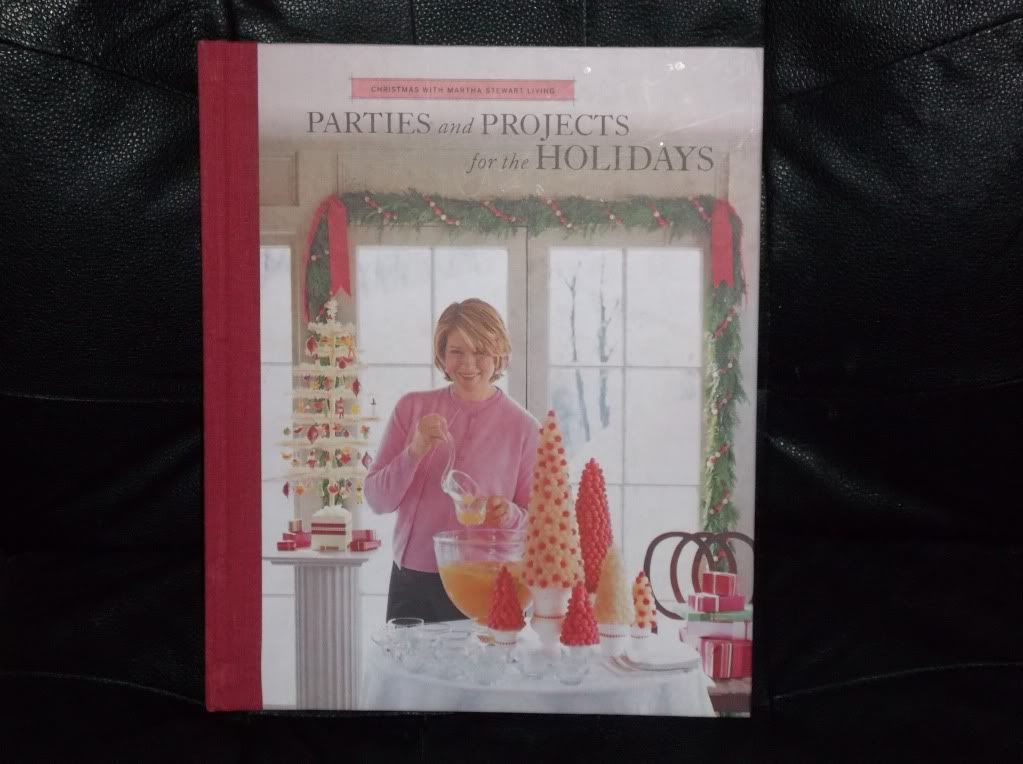 In the book, they didn't make these gumdrop ornaments, they made a gumdrop ball into a gumdrop topiary. We decided to make the gumdrop balls and turn them into gumdrop Christmas ornaments. Here is how we did it.
You will need a 2" styrofoam ball, or whatever size styrofoam ball you want your ornaments to be, small gumdrop candies, toothpicks, ribbon and a hot glue gun.
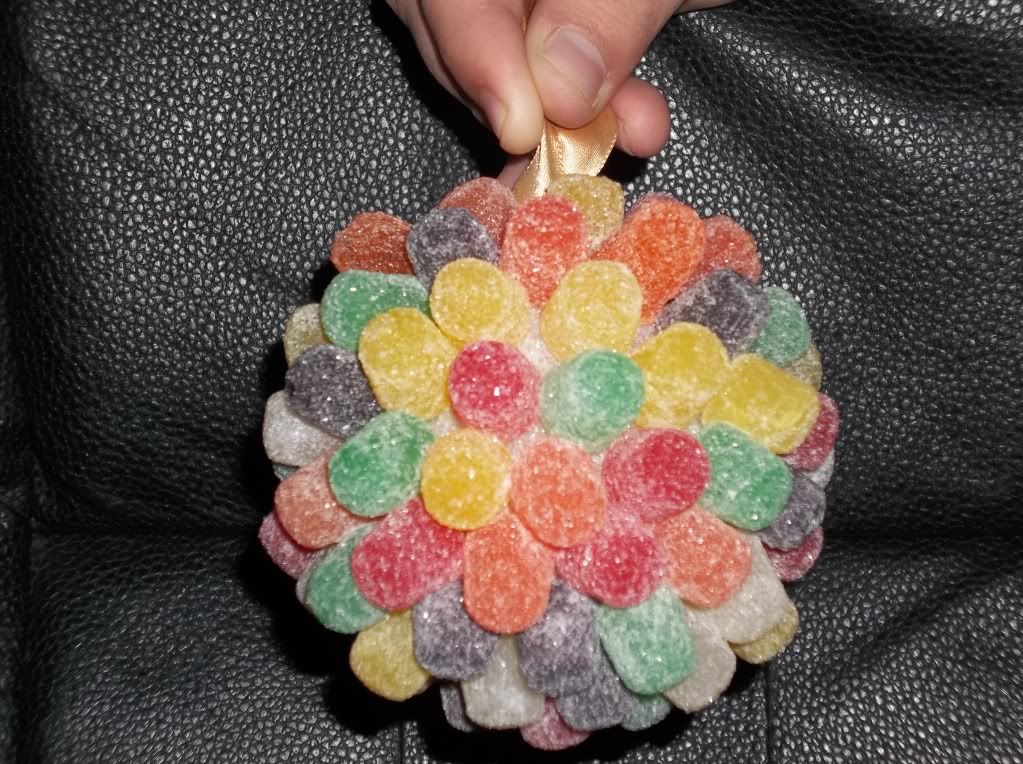
First, cut your ribbon the length you want your ornaments to hang. If using them on your Christmas tree, I would cut them no less them six inches in length. If you want to use them as decorations, I would cut the ribbon alot longer.
Take your styrofoam ball and punch a small hole in it big enough to glue your ribbon. We put the hot glue into the hole first (do this fast because the glue will start melting the styrofoam) and then we folded our ribbon in half and stuck it down in the hole with a toothpick so it would stick to the glue. Once your glue has dried, start breaking your toothpicks in half and poke the pointed ends into the foam; push small gumdrops onto exposed ends. Your ornament is complete once you cover the whole styrofoam ball.
 Let me know if you try these cute ornaments and how it went. If you blog and have pictures, post your link so we can see how yours turned out.
Dana
Every month in our homeschool group, the girls and moms get together for the Keepers at Home meeting. Its alot like girl scouts but more Christ-centered. For mothers, I believe its the most important time in our lives, THE most important time God has given us to teach our girls about our Lord Jesus Christ, about one day being a Christian woman and being prepared to be a wife, a mother, and how to manage a home. Being a "keeper at home" is a very enjoyable, sometimes hard and very worthwhile job.
A few weeks ago, I was suppose to teach the girls something new at our meeting and our whole family came down with a stomach bug and we had to cancel. So, the other day, we decided to make these little ornaments for our family to enjoy for Christmas this year. We gave each grandmother, aunt and great-grandmother one. They are really easy to make. We came across the idea in this Martha Stewart Christmas Book entitled "Parties and Projects for the Holidays".
You will need a 2" styrofoam ball, or whatever size styrofoam ball you want your ornaments to be, small gumdrop candies, toothpicks, ribbon and a hot glue gun.
First, cut your ribbon the length you want your ornaments to hang. If using them on your Christmas tree, I would cut them no less them six inches in length. If you want to use them as decorations, I would cut the ribbon alot longer.
Take your styrofoam ball and punch a small hole in it big enough to glue your ribbon. We put the hot glue into the hole first (do this fast because the glue will start melting the styrofoam) and then we folded our ribbon in half and stuck it down in the hole with a toothpick so it would stick to the glue. Once your glue has dried, start breaking your toothpicks in half and poke the pointed ends into the foam; push small gumdrops onto exposed ends. Your ornament is complete once you cover the whole styrofoam ball.
Dana
Thursday, November 24, 2011
~Happy Thanksgiving~

Give thanks to the Lord, for he is good; his love endures forever.
1 Chronicles 16:34
Wednesday, November 23, 2011
Great Giveaway from Vision Forum

Vision Forum is one of our family's favorite places to shop for great, trust-worthy Christian books, DVDS, audiobooks and more. We have many of their products in our home. I love how they have a Deal of the Day. I check periodically to see if it's something we might could get one of the bugs for a birthday or Christmas present.
As of right now, they are partnering with here, here, here, and here so go check it out.
Dana
Monday, November 21, 2011
THANKSGIVING PLANS!
We are pretty excited about Thanksgiving this year. We, for the past few days have been studying alot about the first Thanksgiving and doing quite a few Thanksgiving crafts. Today, the little ones made Thanksgiving books and the older ones made Thanksgiving placemats. I will try to post picture later.
Tomorrow we will make sure we have everything for our cooking and Wednesday, we will start cooking for the holiday. As of right now, we are having.......
Turkey
Cornbread Dressing
Dumplings
Baked Mac-n-cheese
Candied Yams
Green Bean Casserole
Homemade Dinner Rolls
Sweet Potato Pie
Pecan Pie
The girls and I will start cooking all of this Wednesday to have everything ready for Thursday. It is also their dad's birthday on Thanksgiving Day, so we might need to add some kind of birthday cake to the menu. Maybe a Hershey's Chocolate Cake, YUM!!!!
We are looking forward to a weekend filled with love, celebration and thankfulness. We have so much to be thankful for!
Dana
I will praise God's name in song and glorify him with Thanksgiving.
Psalm 69:30
Friday, November 18, 2011
Our Day of FUNschooling!
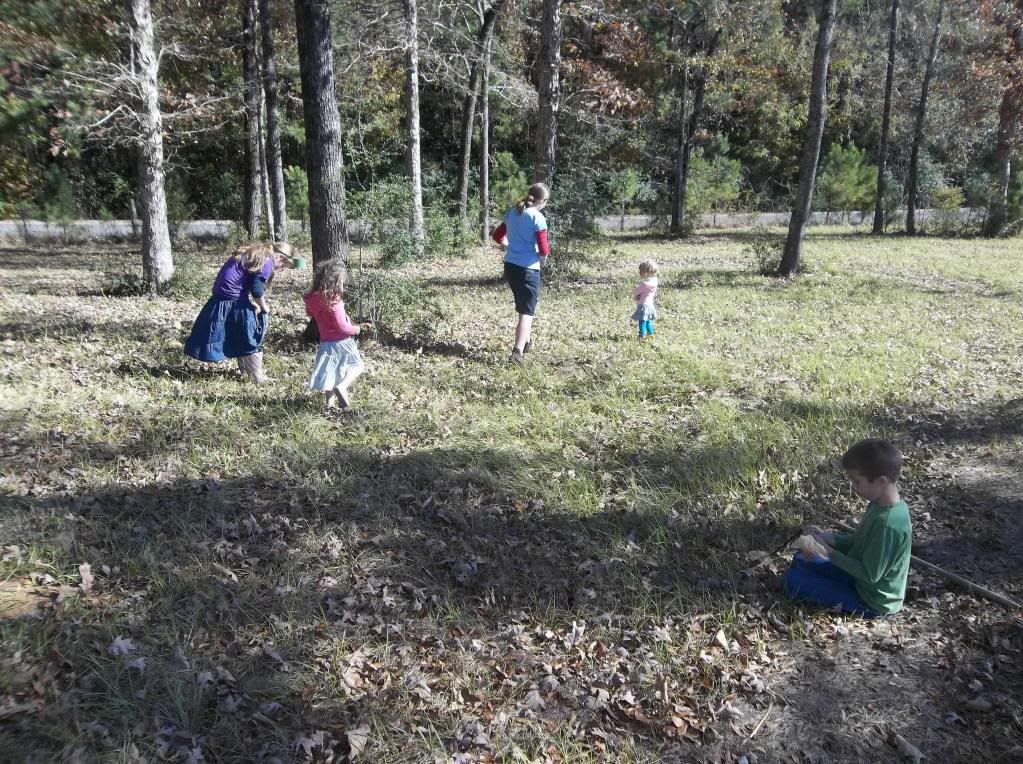
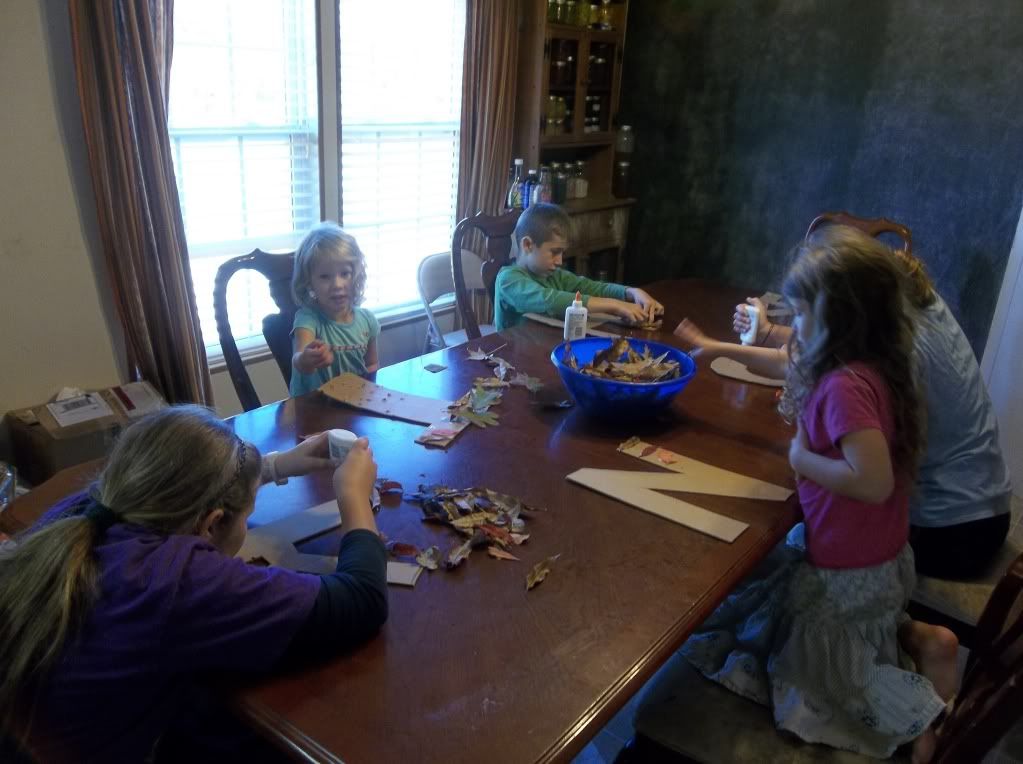
We have been planning on taking one day before Thanksgiving to do a few crafts. Today was that day. We had so much fun just learning, playing and having fun. I am so thankful that we are able to teach our children at home and do things like this. We started out gathering leaves for one of our projects.
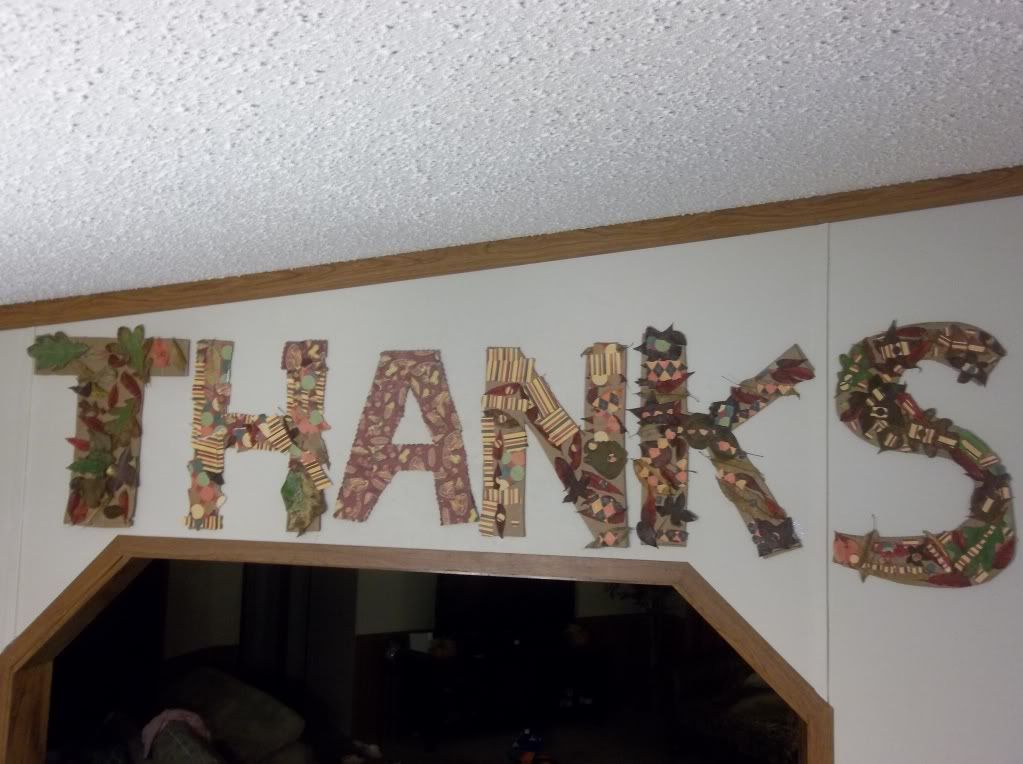
I was on Pinterest a few days ago and saw the cutest project using leaves from the yard, cardboard letters and glue. We cut the word THANKS out of cardboard, in individual letters and glued the leaves we collected out of the pasture onto the letters. We also used some scrapbooking paper on ours to make it a little more our own. We had such a good time.
 We also made us a Thankful Tree.
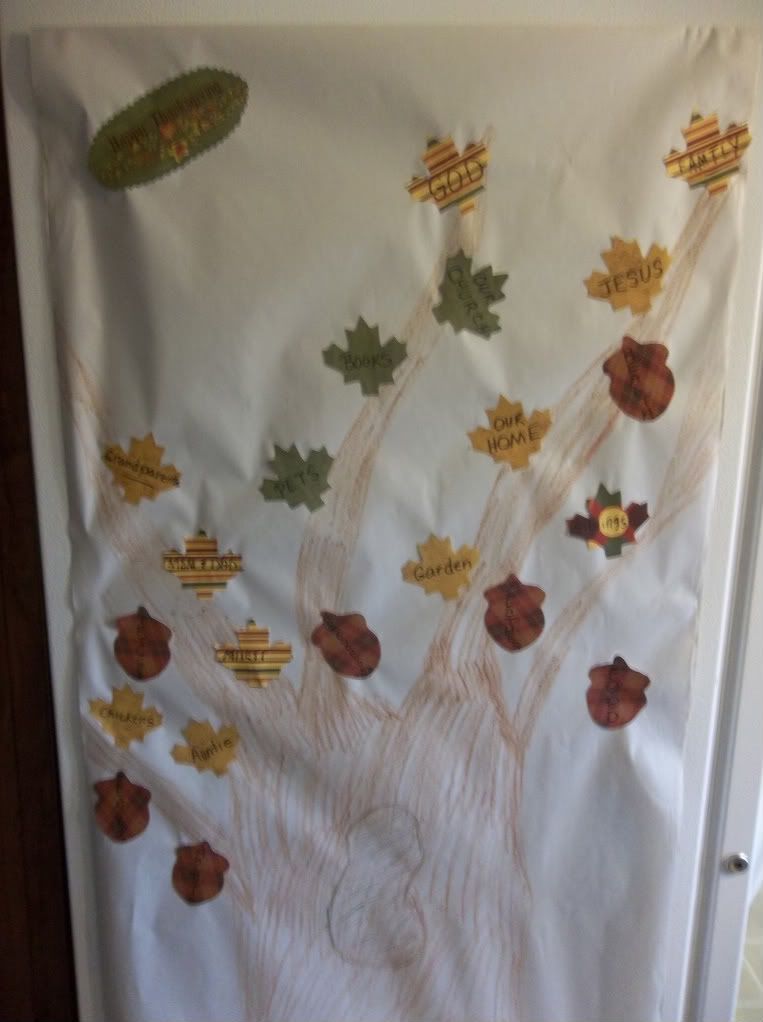
And whatever you do, whether in word or deed, do it all in the name of the Lord Jesus, giving thanks to God the Father through him.
Colossians 3:17
I was on Pinterest a few days ago and saw the cutest project using leaves from the yard, cardboard letters and glue. We cut the word THANKS out of cardboard, in individual letters and glued the leaves we collected out of the pasture onto the letters. We also used some scrapbooking paper on ours to make it a little more our own. We had such a good time.
Here are our letters we hung above the dining room entrance.
And whatever you do, whether in word or deed, do it all in the name of the Lord Jesus, giving thanks to God the Father through him.
Colossians 3:17
Wednesday, November 16, 2011
Large Family Food Storage Solutions
Our current method of food storage is lots of glass, mason jars and gallon-size glass jars.
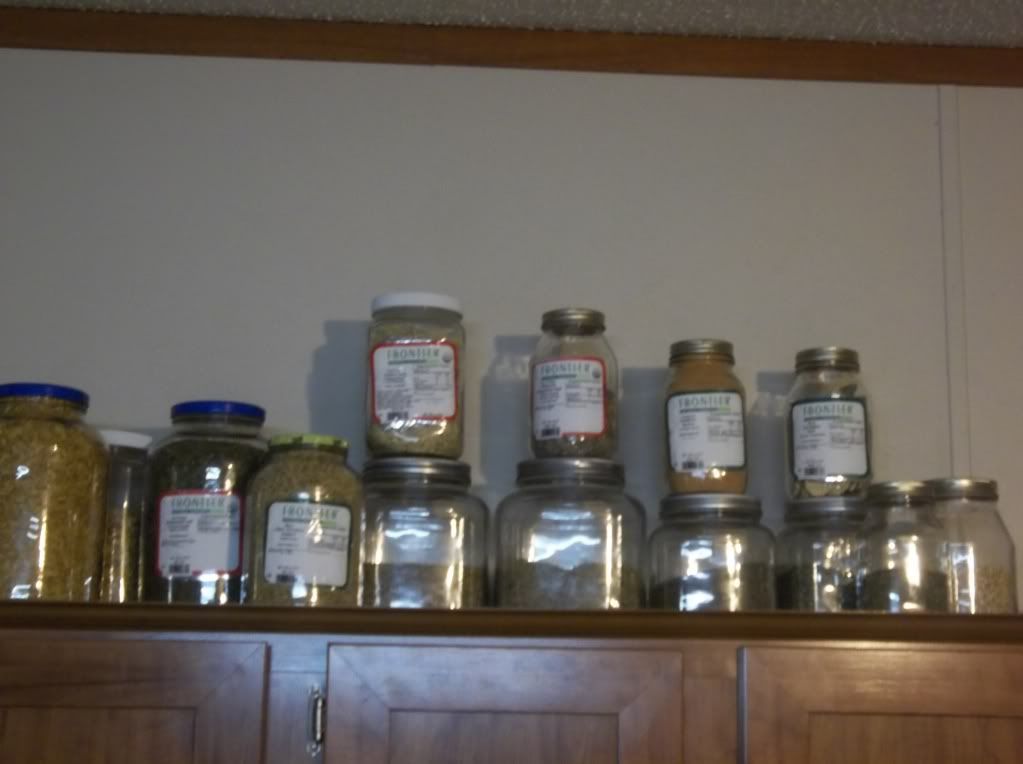
We buy dill pickles at Sam's and eat the pickles and keep the jars for storage. We store most of our herbs in these jars above the cabinets in the kitchen. It keeps them fresh. We buy herbs, grains and beans in bulk. I try to keep our rice and beans in the freezer when there is enough room. I will take some of them out of the freezer and store them in quart size mason jars to free up some of the freezer space.
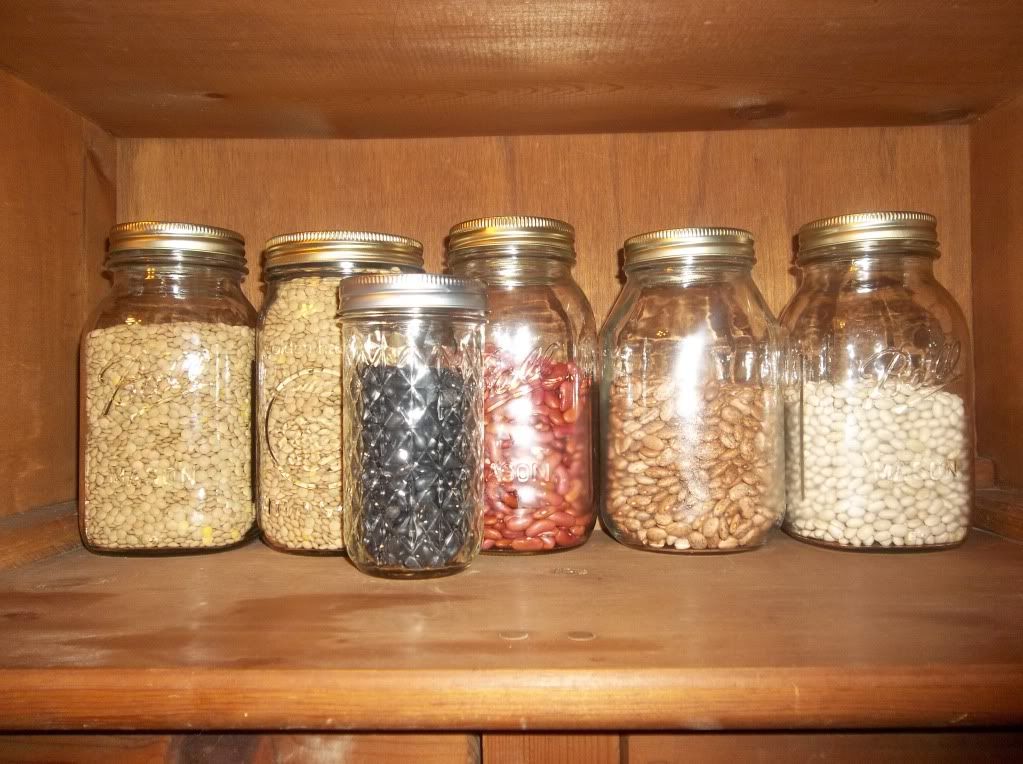
We also use 5 gallon buckets to store our rolled oats, sugar and other things in. In the near future, I plan on investing in Gamma Lids. I found these http://www.walmart.com/ip/Anchor-Hocking-Cracker-Jar-with-Lid/16520333 at Walmart. They are really pretty and come in a few different sizes. I use these to store herbs. These are just a few ways to store food in bulk. Leave me a comment with your food storage solutions.
Dana
We buy dill pickles at Sam's and eat the pickles and keep the jars for storage. We store most of our herbs in these jars above the cabinets in the kitchen. It keeps them fresh. We buy herbs, grains and beans in bulk. I try to keep our rice and beans in the freezer when there is enough room. I will take some of them out of the freezer and store them in quart size mason jars to free up some of the freezer space.
We also use 5 gallon buckets to store our rolled oats, sugar and other things in. In the near future, I plan on investing in Gamma Lids. I found these http://www.walmart.com/ip/Anchor-Hocking-Cracker-Jar-with-Lid/16520333 at Walmart. They are really pretty and come in a few different sizes. I use these to store herbs. These are just a few ways to store food in bulk. Leave me a comment with your food storage solutions.
Dana
Sunday, November 13, 2011
Baking Pumpkins!
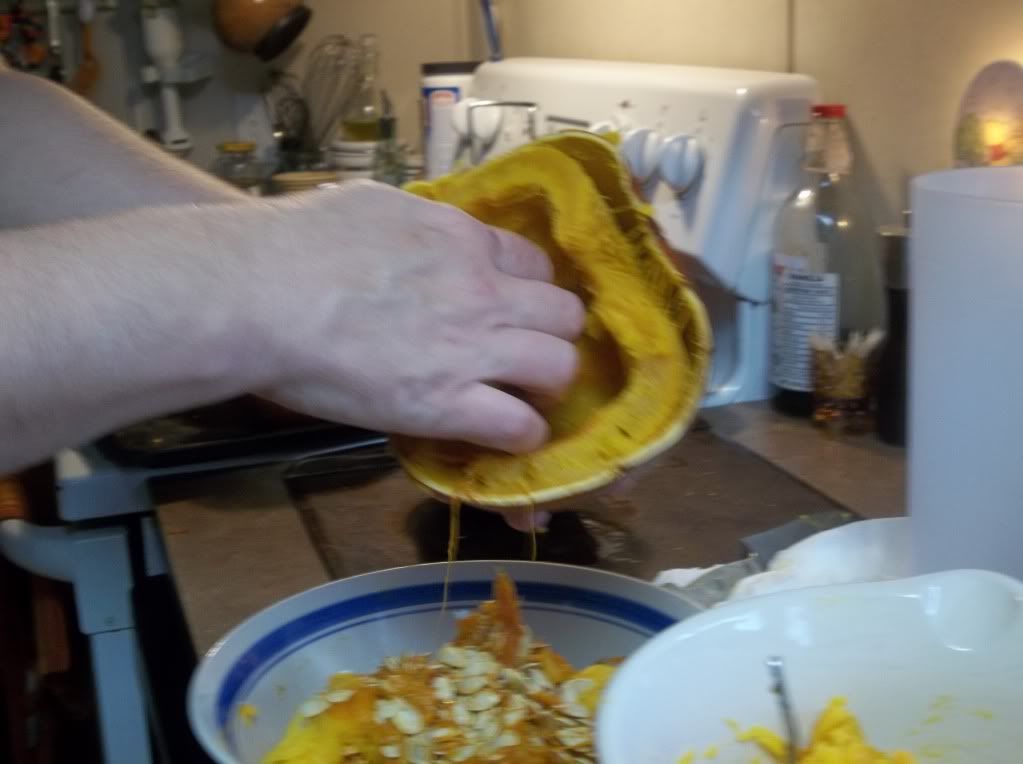
Well, today was the day to bake our little pumpkins we got from the pumpkin patch. We have baked pumpkins before and put the pumpkin puree in the freezer but today we baked them a little different than we have ever baked them before. Instead of cutting them open, scraping out the seeds and putting them on a baking pan cut side down, we baked them whole. Has anyone ever done this? I recently saw someone do this on their blog and thought I really need to try this with our little pumpkins. Here are few pictures on how we did this. We baked a total of six pumpkins today. 13 1/2 cups of pumpkin puree went into the freezer. We are planning on making some of that yummy Chocolate Chip Pumpkin Bread in a few days. Start by washing your pumpkins really good.
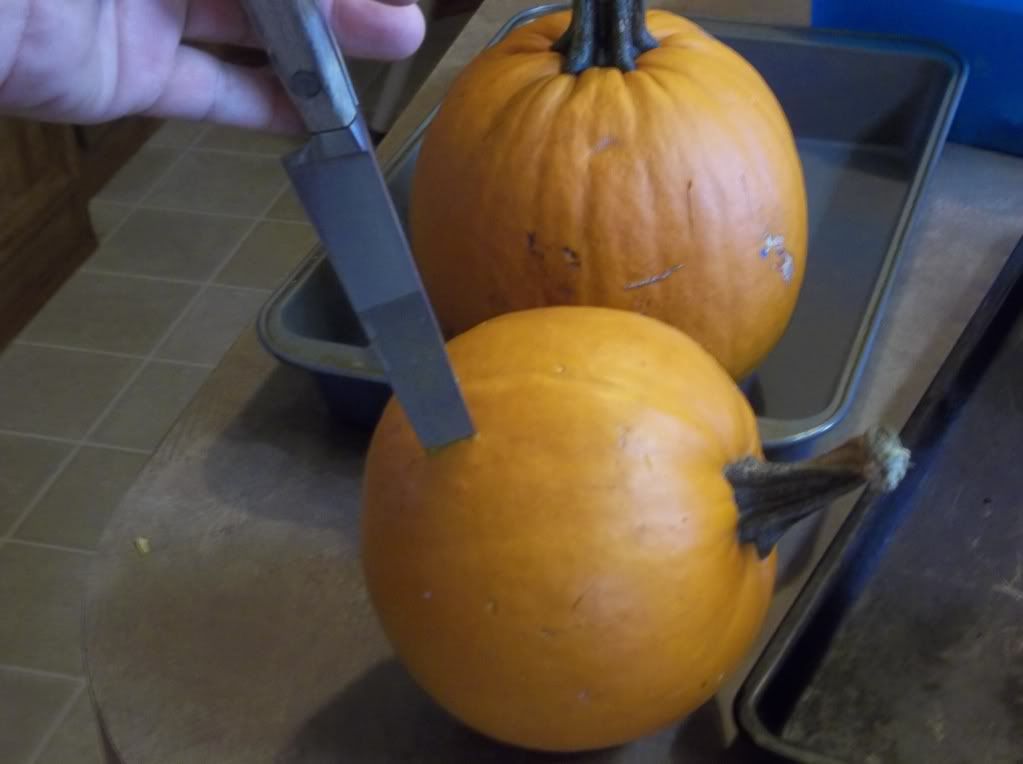
Then, as you can see you will need to poke about 6 holes in each pumpkin. Place them on baking sheets and bake them about one hour in a 350 degree oven. They will look like this when they are fully cooked.
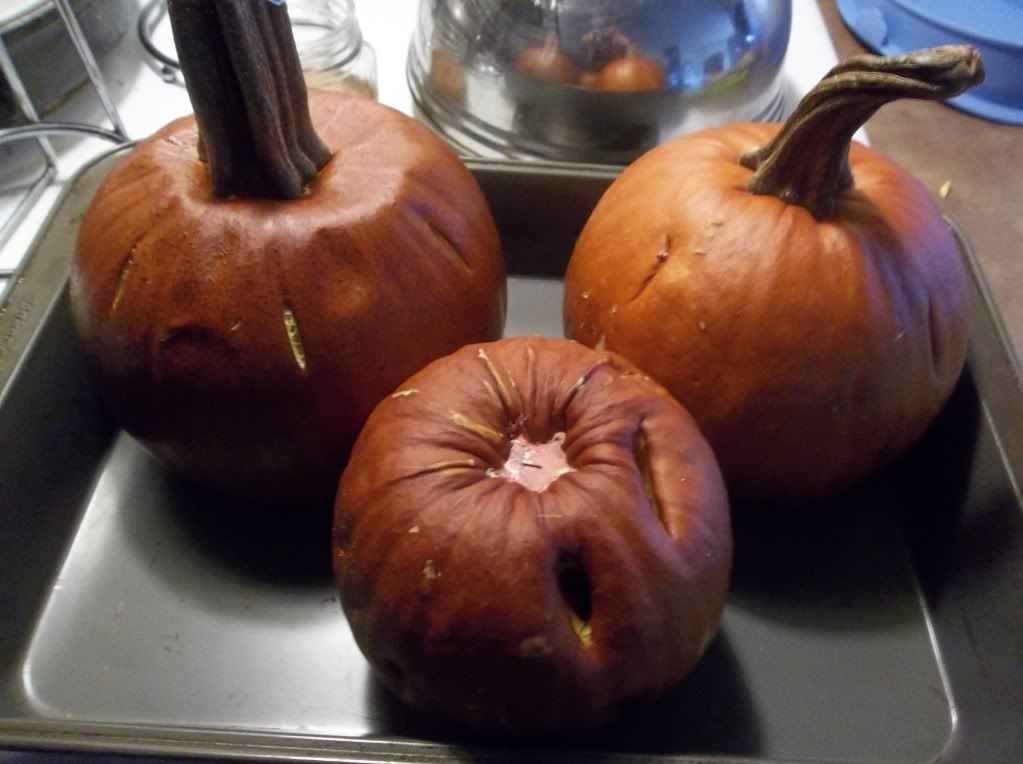
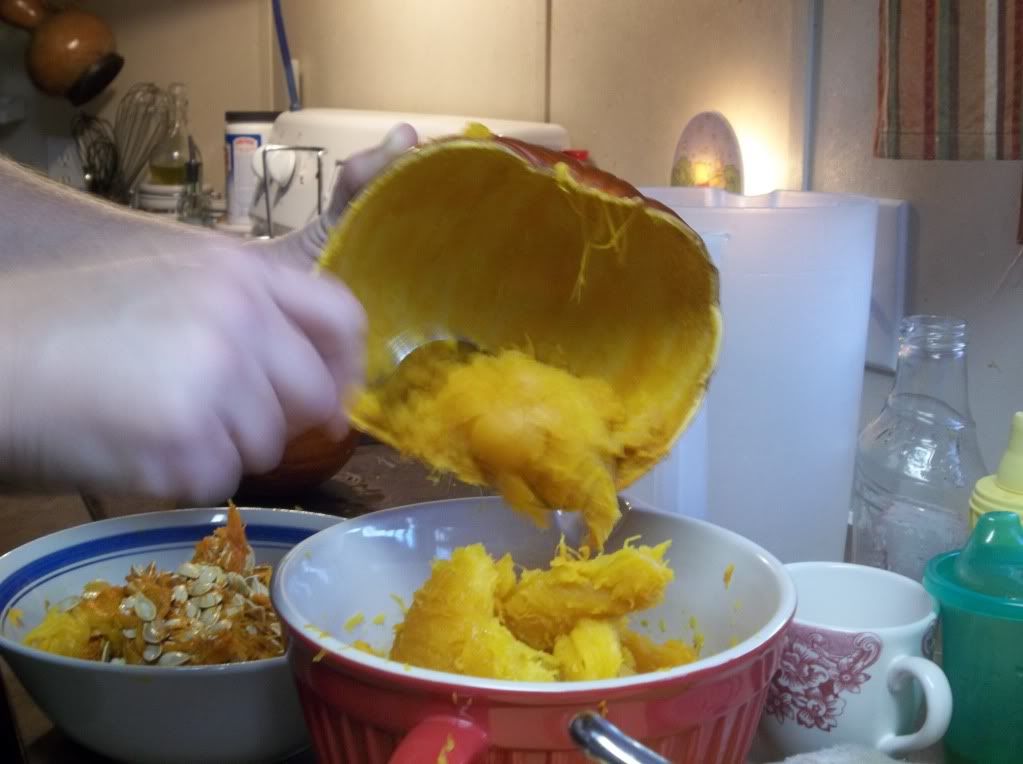
When they cool enough to handle, you can peel the outer layer off or cut them in half and scoop out the seeds and then the yummy cooked pumpkin.
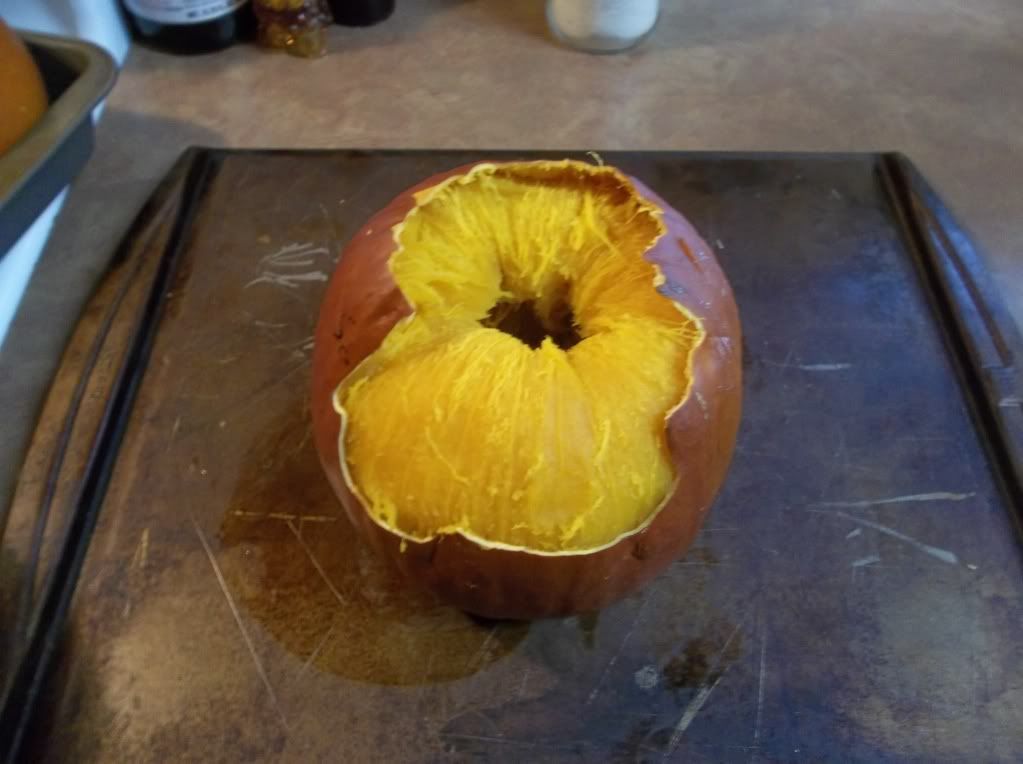
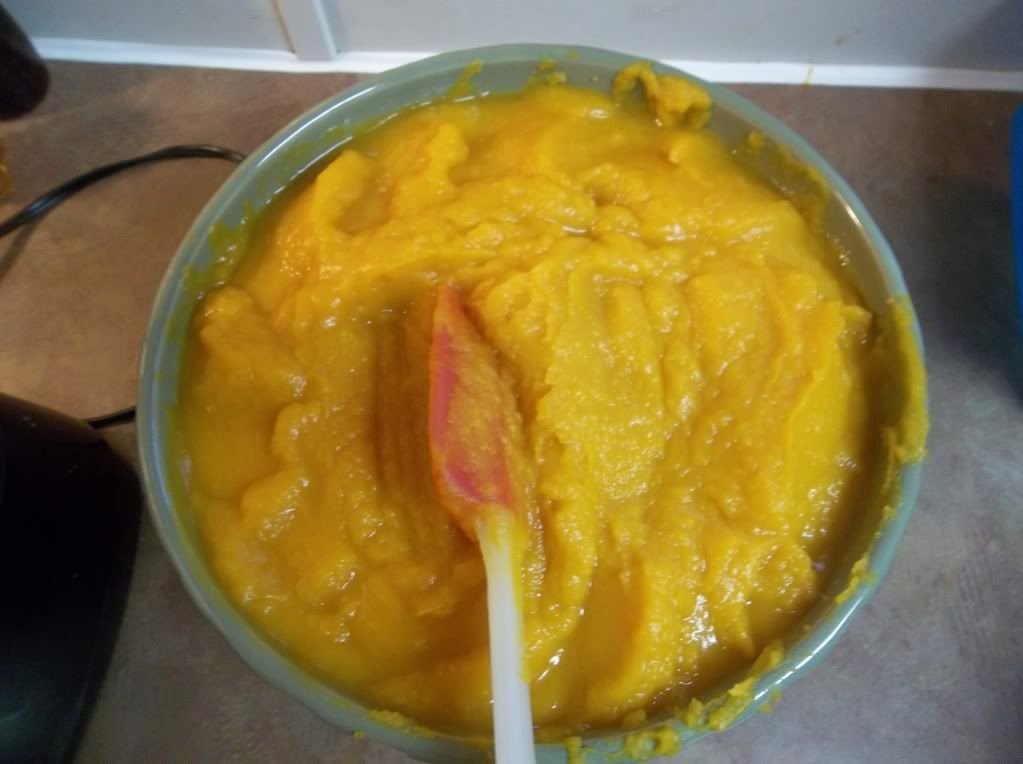
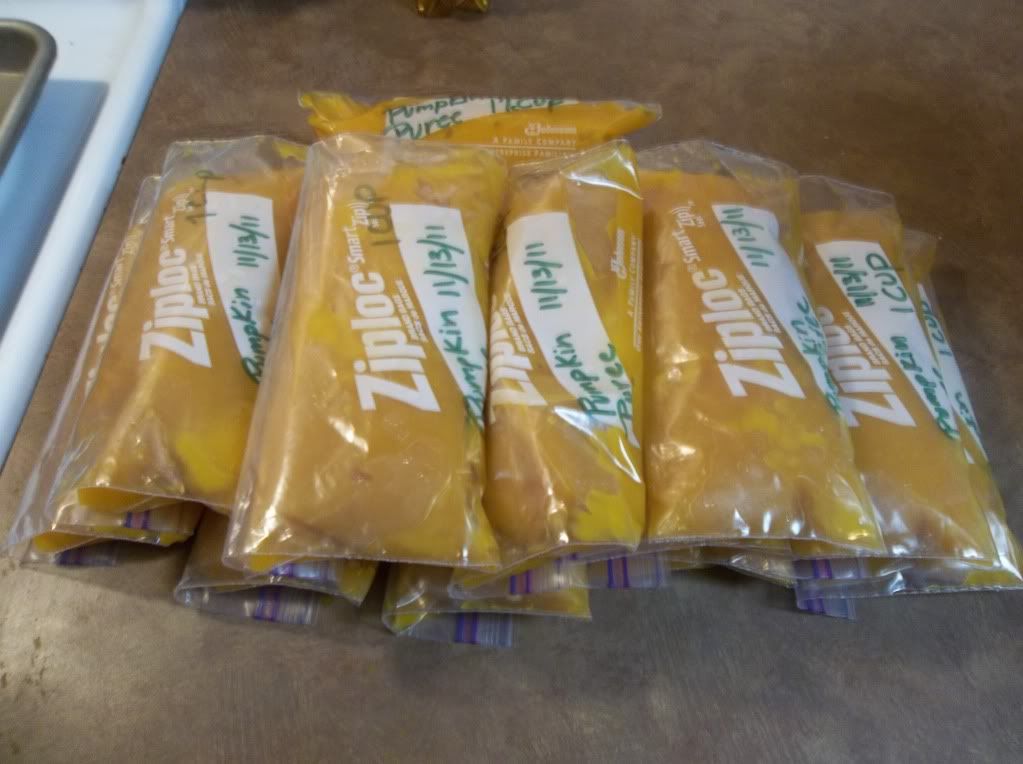
Now its ready for the freezer.
Enjoy!
DANA
Saturday, November 12, 2011
Yummy Rolls!
I have been baking for quite some time. We love baking in our kitchen, especially bread. We always try to bake some kind of bread every few days. We have so many recipes for bread, rolls, pizza bread, and cinnamon rolls . Here is one of our favorite roll recipes. I ran across this recipe in a magazine a long time ago and kind of made it my own. We use a variety of flours and sweeteners in bread dough for these kinds of recipes. Enjoy making these rolls and let me know what you think.
NO-KNEAD DINNER ROLLS
2 cups warm water, around 110 degrees
1 Tablespoon yeast
1/4 cup sugar, I usually use sucanat or honey
4 Tablespoons butter, melted
2 large eggs, lightly beaten
1 1/2 teaspoons sea salt
6 cups flour, (I used organic, unbleached all-purpose and organic whole wheat in this recipe.)
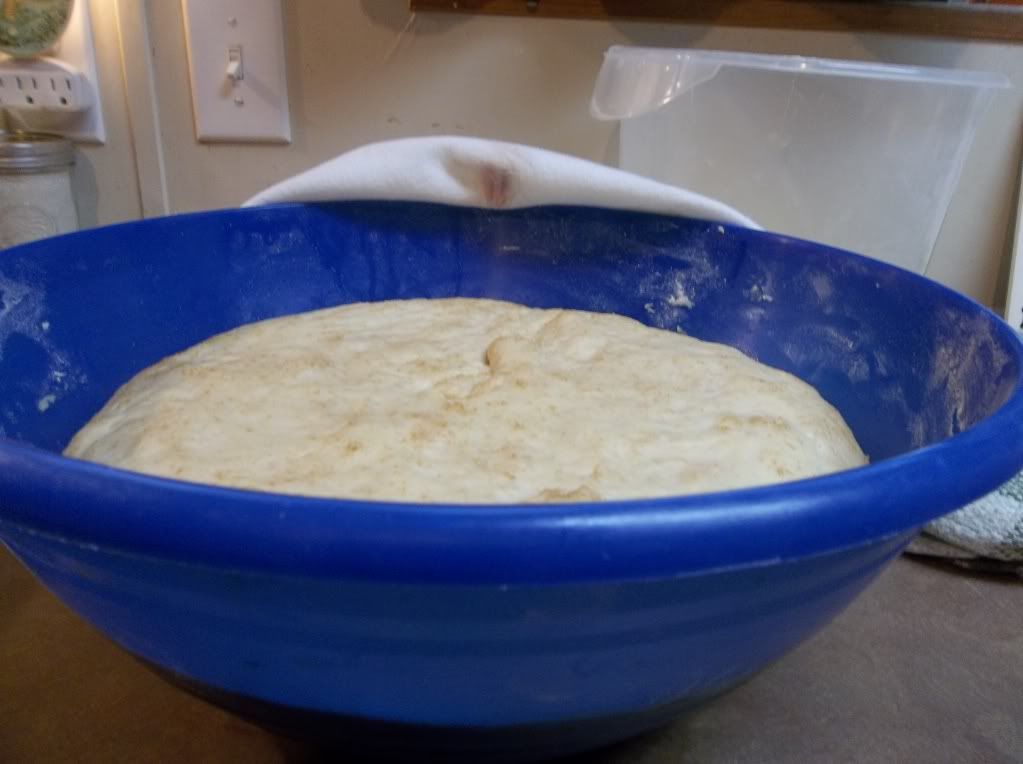
Pour warm water into a large bowl and sprinkle with the yeast and let stand until foamy. Add sugar, butter, eggs and salt; whisk to combine. Add flour (in this recipe I used 4 cups of the all-purpose and 2 cups of the whole wheat). Mix until a sticky dough forms. Cover the bowl with a dish towel and set aside in a warm place until dough has doubled in bulk.
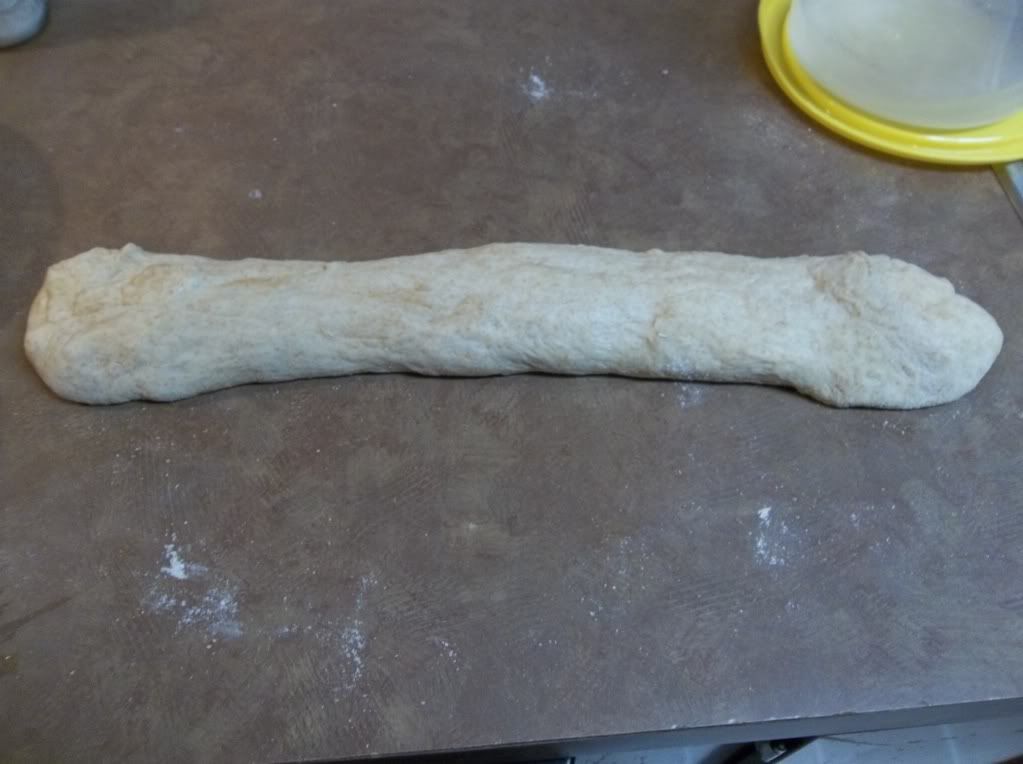
Turn the dough out onto a well floured work surface and roll into a thick log.
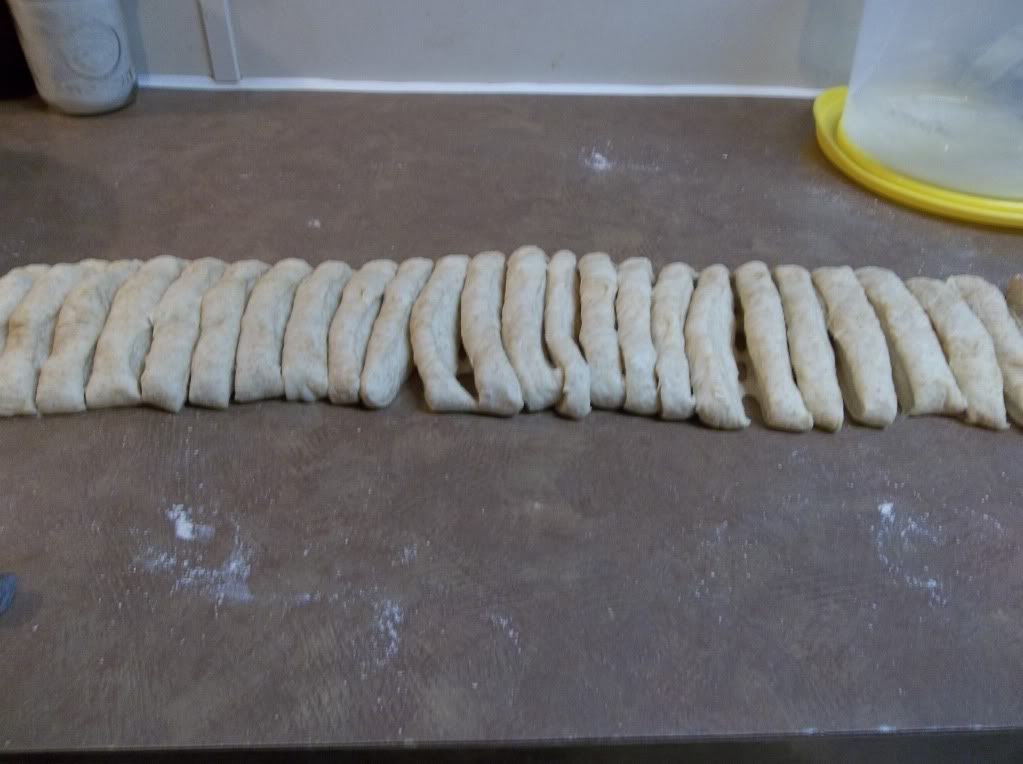
Cut the log into about 20 equal pieces.
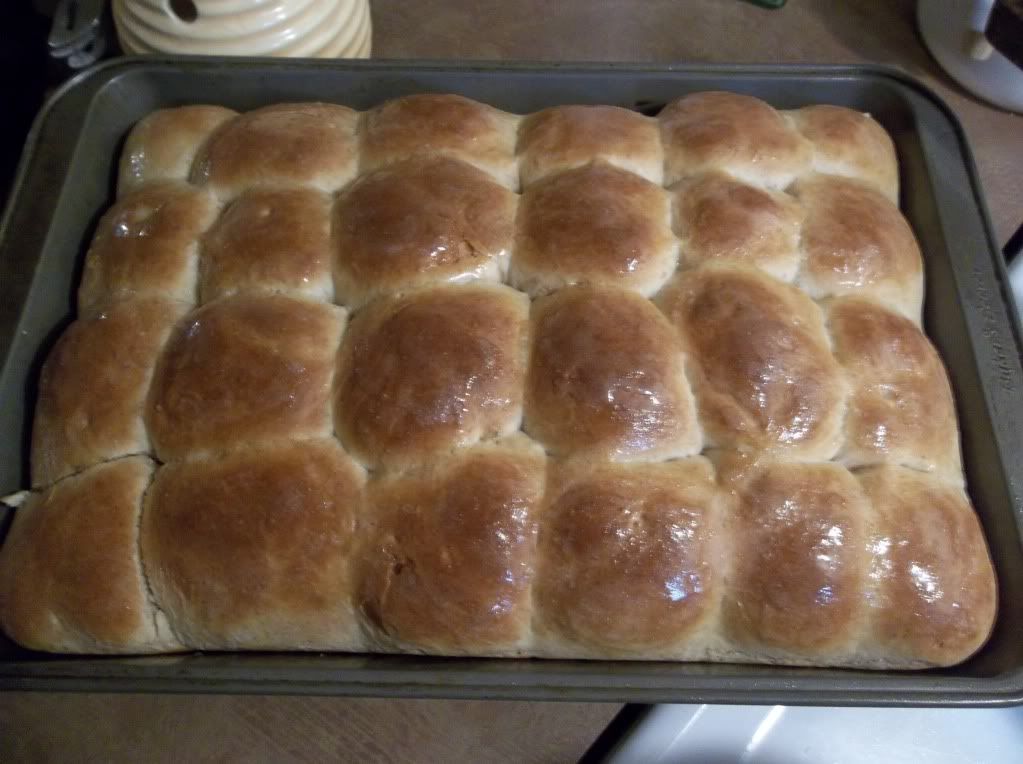
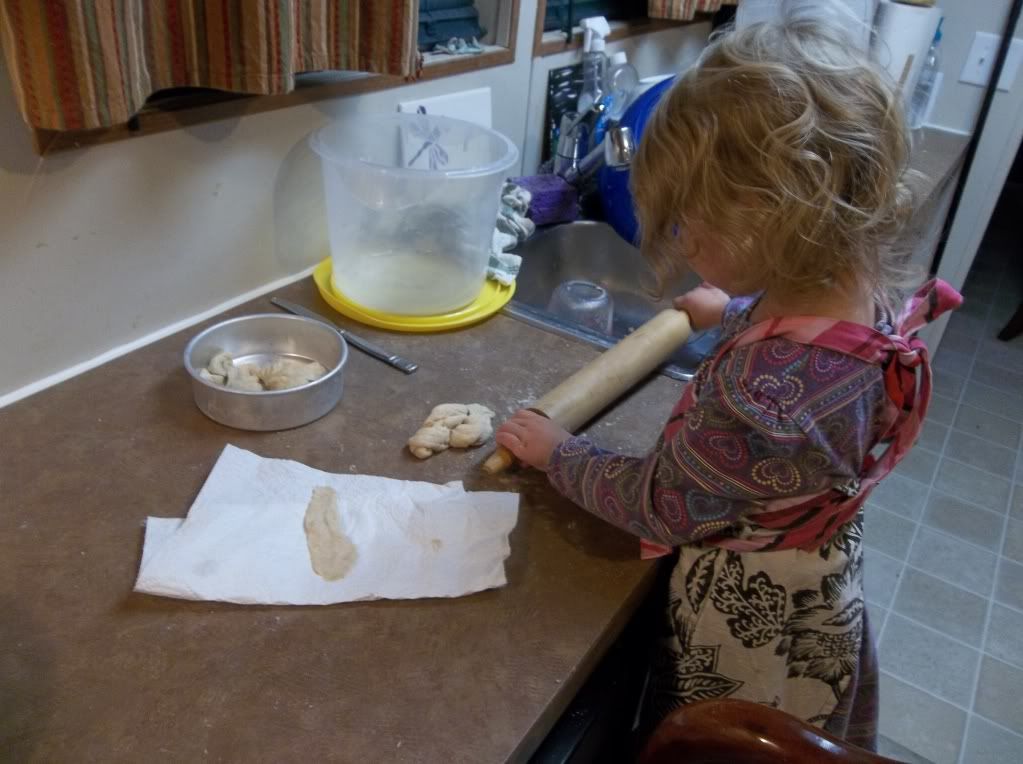
Brush a 9 x 13 inch baking pan with butter. One at a time, flatten each piece of dough, then fold edges toward the center, pressing to secure, until a smooth ball forms. Place dough balls in prepared baking pan, smooth side up. Cover with dish towel and let rise until doubled in bulk.

Here is my little helper today in the kitchen. Isn't she so cute in my apron! I am so blessed, I always have little helpers around here.
NO-KNEAD DINNER ROLLS
2 cups warm water, around 110 degrees
1 Tablespoon yeast
1/4 cup sugar, I usually use sucanat or honey
4 Tablespoons butter, melted
2 large eggs, lightly beaten
1 1/2 teaspoons sea salt
6 cups flour, (I used organic, unbleached all-purpose and organic whole wheat in this recipe.)
Pour warm water into a large bowl and sprinkle with the yeast and let stand until foamy. Add sugar, butter, eggs and salt; whisk to combine. Add flour (in this recipe I used 4 cups of the all-purpose and 2 cups of the whole wheat). Mix until a sticky dough forms. Cover the bowl with a dish towel and set aside in a warm place until dough has doubled in bulk.
Turn the dough out onto a well floured work surface and roll into a thick log.
Cut the log into about 20 equal pieces.
Brush a 9 x 13 inch baking pan with butter. One at a time, flatten each piece of dough, then fold edges toward the center, pressing to secure, until a smooth ball forms. Place dough balls in prepared baking pan, smooth side up. Cover with dish towel and let rise until doubled in bulk.
These have already doubled in size and ready for the oven.
Preheat oven to 400 degrees and bake until golden brown, about 34 to 40 minutes, depending on your oven.
Here is my little helper today in the kitchen. Isn't she so cute in my apron! I am so blessed, I always have little helpers around here.
O taste and see that the LORD is good: blessed is the man that trusteth in him.
Psalm 34:8
Friday, November 11, 2011
VETERAN'S DAY!
Today is Veteran's Day. I am so thankful to all the American veterans and especially to our American veteran!


WE LOVE YOU BIG DADDY!
Thursday, November 10, 2011
Painting Pumpkins, Art Class?
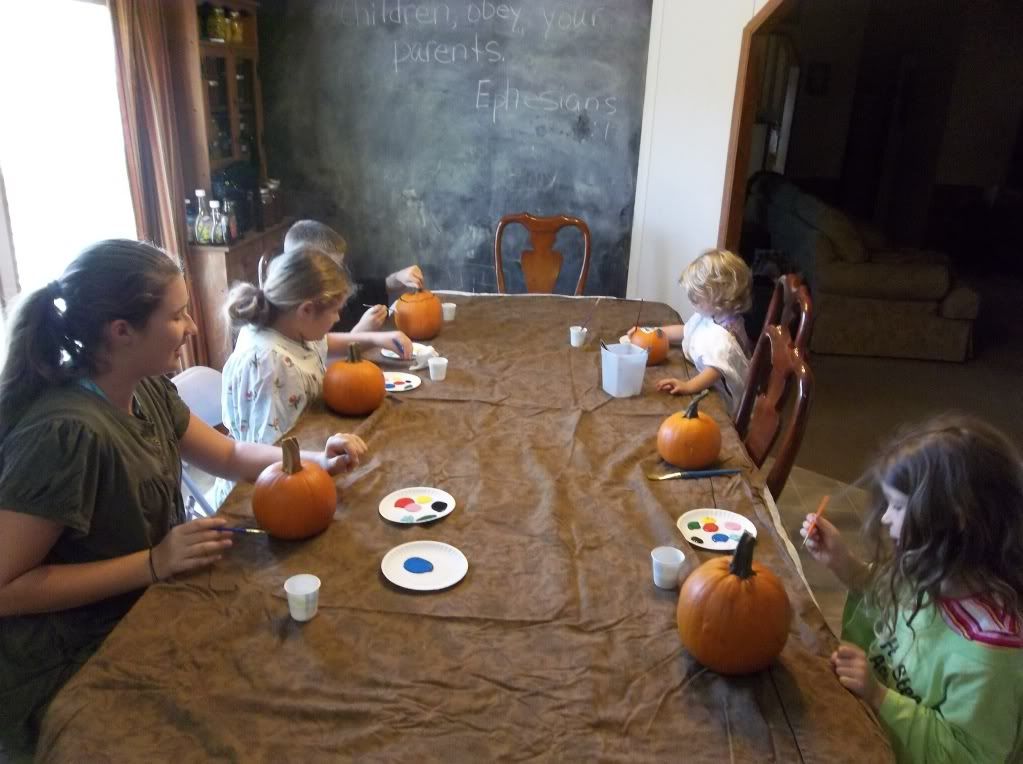
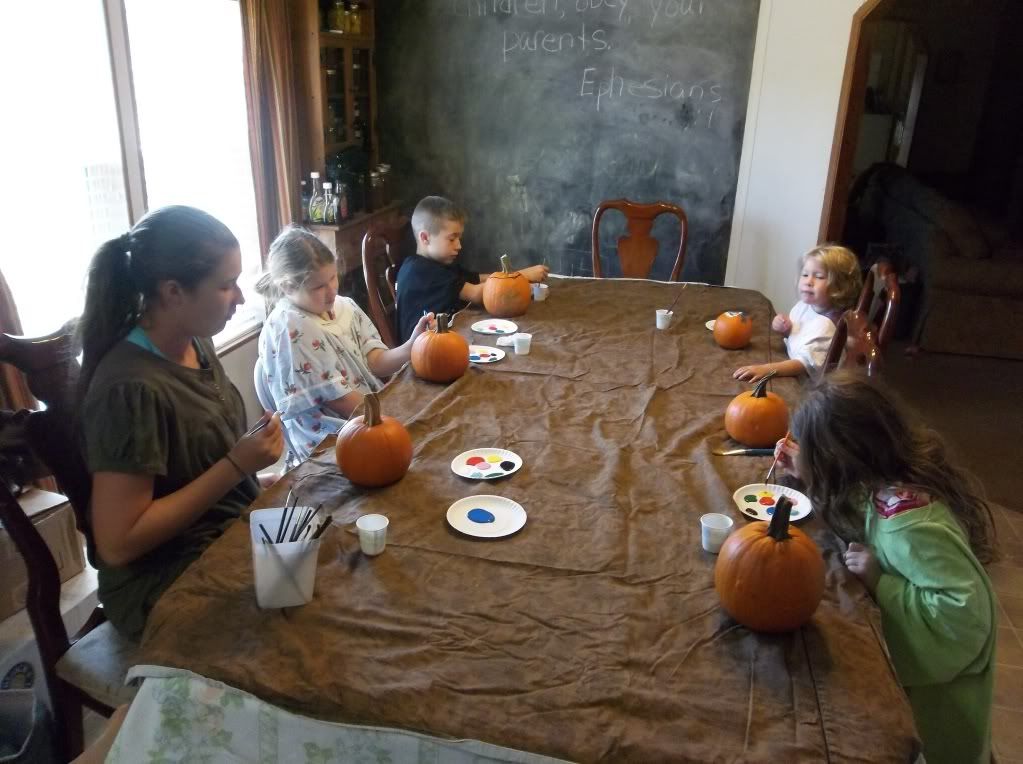
We went to a pumpkin patch at the end of October of this year. Each one of the bugs were able to pick a pumpkin and bring it home. We decided to paint them instead of carving. One reason we paint instead of carve is they last alot longer. Another reason is that we can wash all of the paint off with hot,soapy water and bake them. Once we bake them, we are then able to use them in many yummy recipes and leftover pumpkin freezes very well. Here they are in "Art Class" painting a masterpiece on pumpkins!
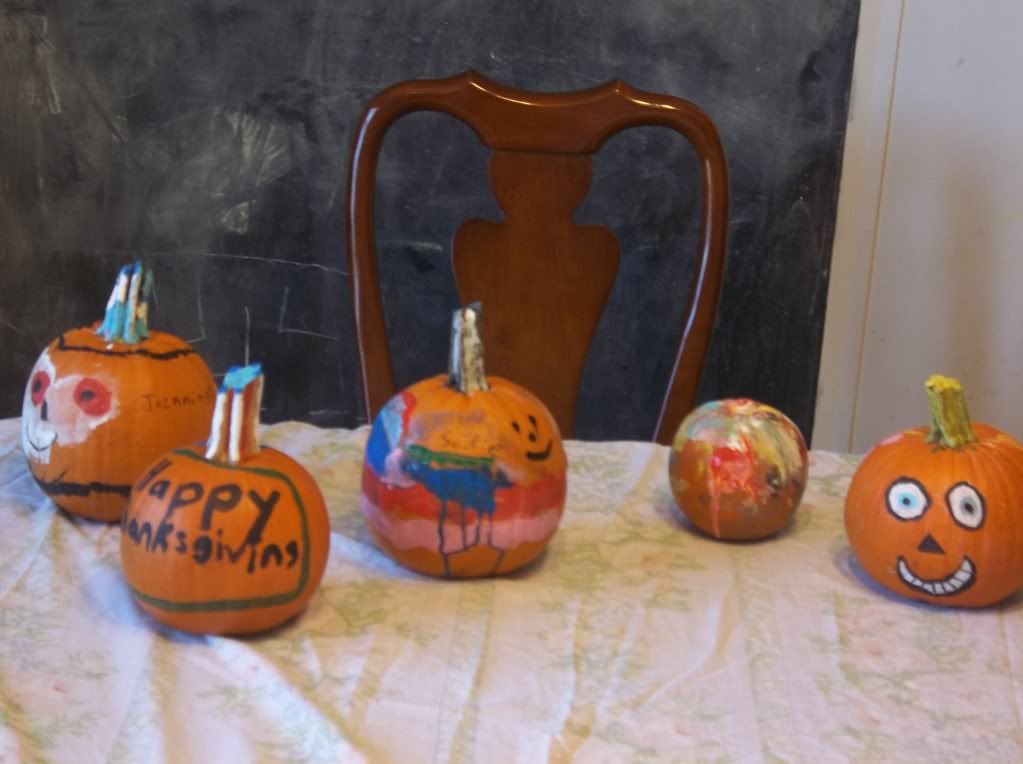
HERE ARE THE FINISHED PAINTED PUMPKINS!!! PERSONALLY, I THINK THEY ARE JUST AMAZING! OOPS, MAYBE I SHOULDN'T HAVE SAID THAT, AFTER ALL, THEY ARE MY BUGS!
Just A Few Things We Have Been Doing Around The Homestead!
We haven't blogged in a few days. Been pretty busy around here. We started play practice at church for our Christmas program that will be December 19th, this past Sunday. Having a lot of fun with that. It is going to be a really good program.
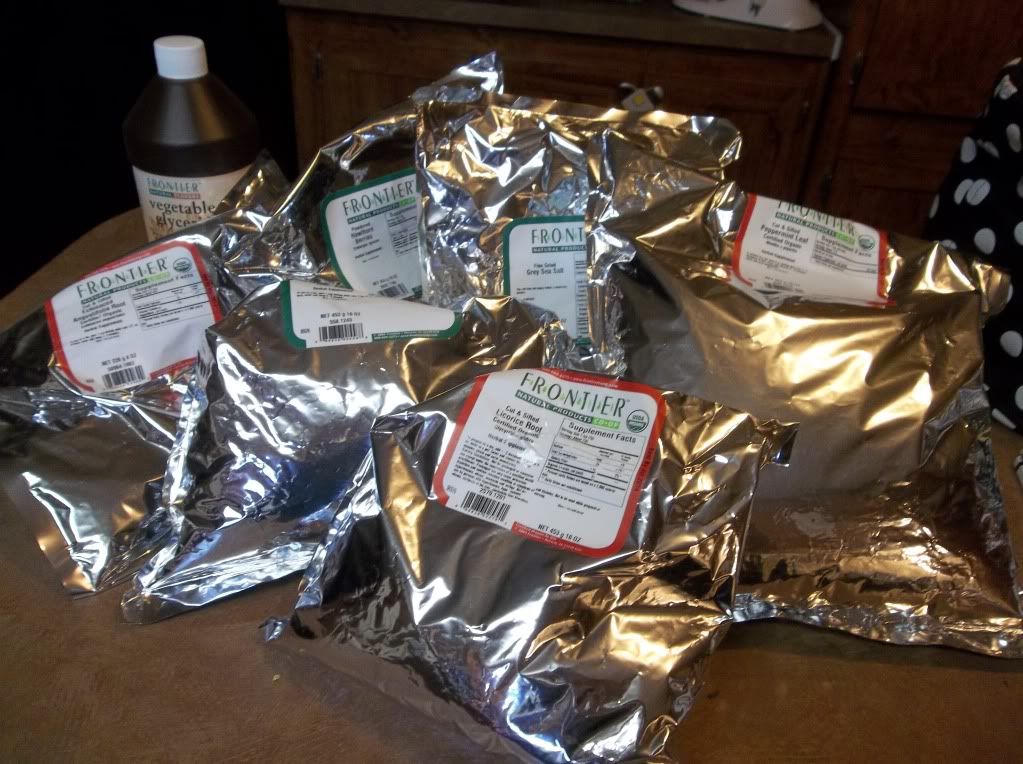
Monday was pretty much a normal day. We started with school, we are doing a Thanksgiving unit study. I will be posting some pictures of a few things we are doing with that. Did some laundry and sorted our herbs we got from Frontier. That's our food co-op with our homeschool group.
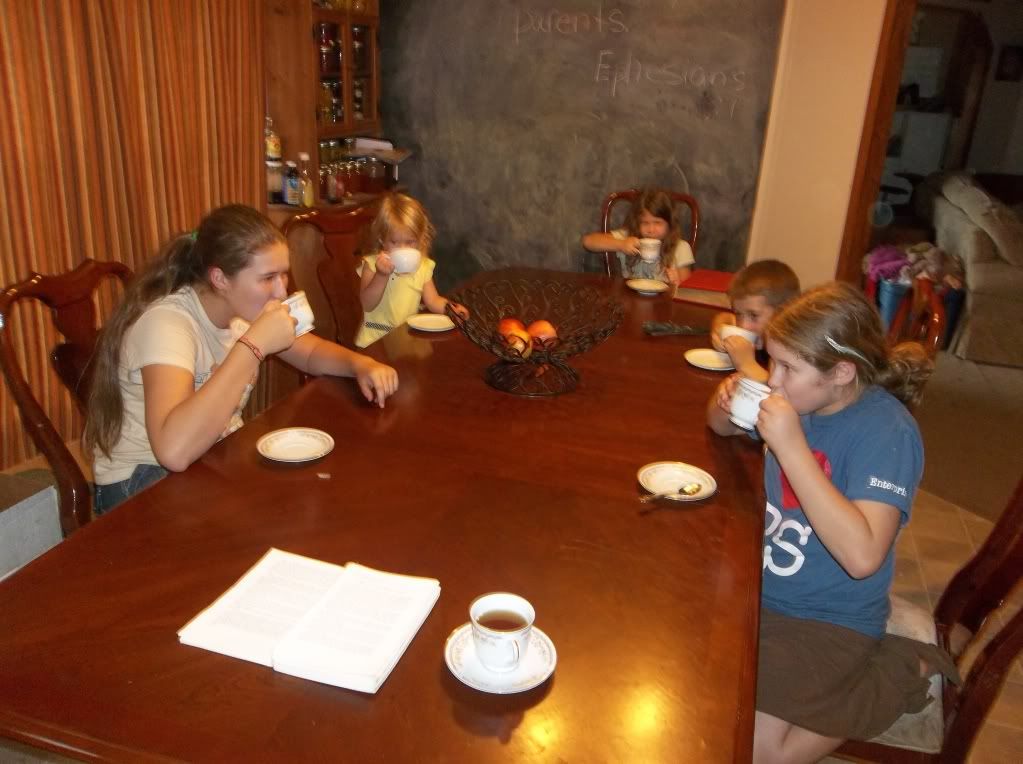
We ordered Peppermint leaves for some of our tinctures we are making and decided to make us some tea. Here are the bugs enjoying some of the Peppermint Tea we made Tuesday! We also had a little bible study while we were sipping our tea. I got a book off of Paperbackswap months ago entitled Little Visits With God. We really enjoy this little book. It has a bible verse, a short story pertaining to the verse, questions to ask the children and a prayer at the end to be read aloud. We all take turns reading the prayer.
We also made our homemade laundry detergent this day also. I will post some pictures of us doing that in another post. Some of my friends are wanting to see this and also wanting the recipe.
Wednesday is usually music day but for us this week, we had to cancel. I was not feeling well so we decided to stay home. So instead of doing music, here is what we ended up doing.
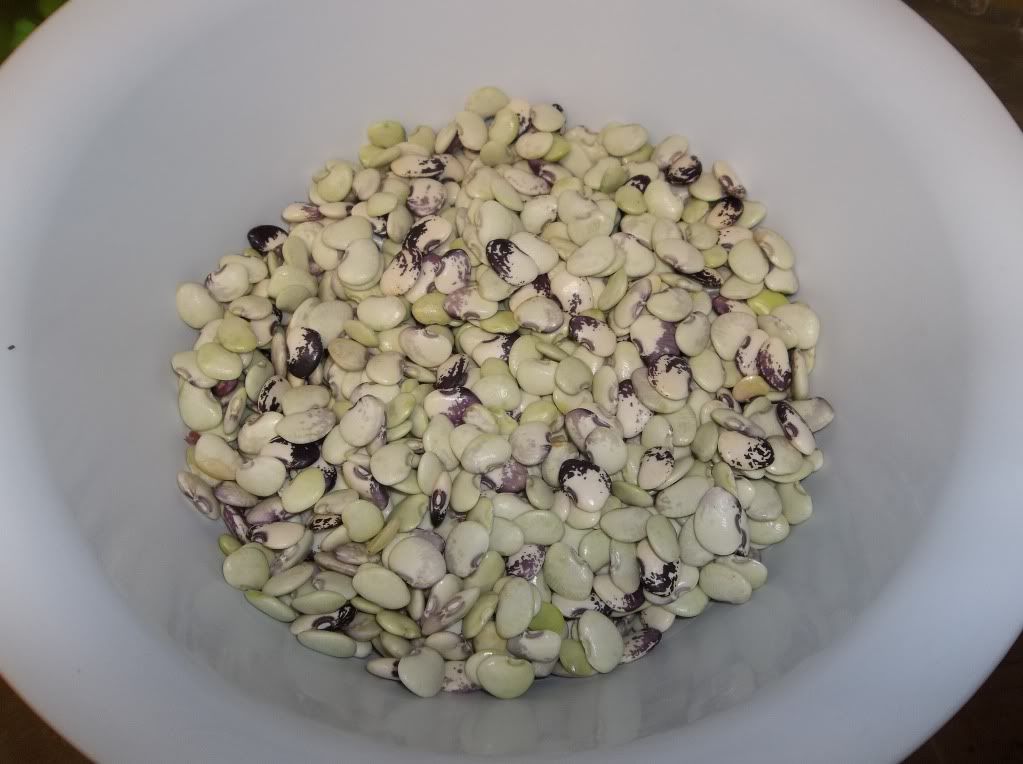
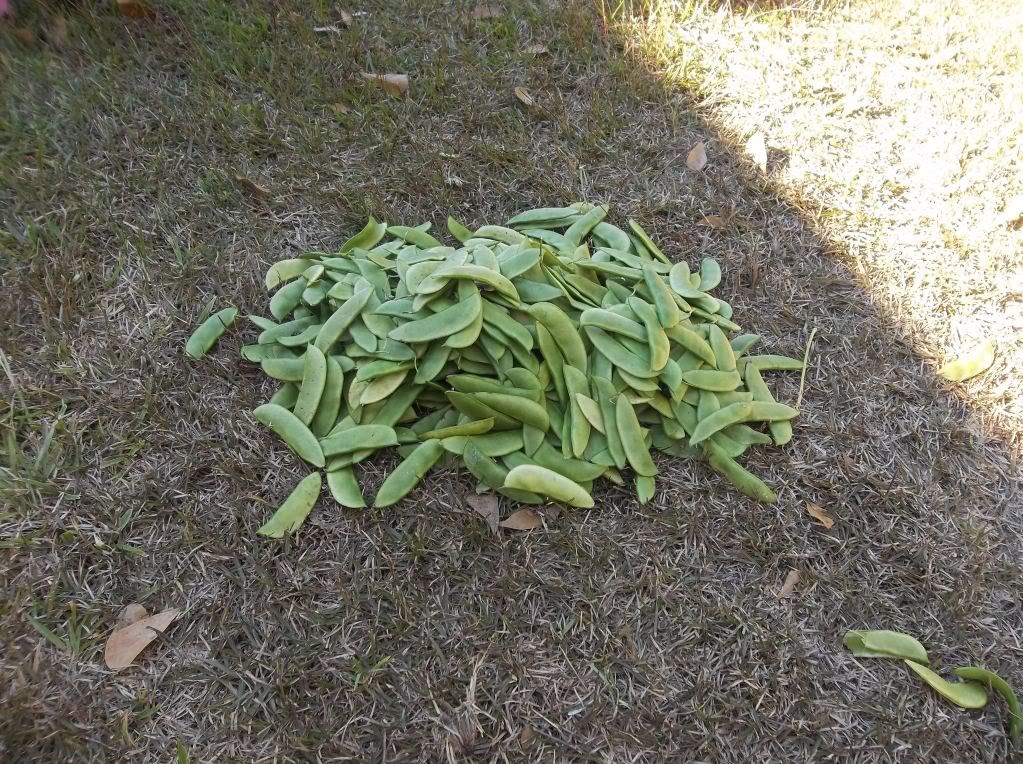 My kids walked out to one of the gardens we have every summer and found these. They picked a few more than this picture shows. We sat at their Maw Maws and Pa Paws house, in the yard and shelled them for supper. We had a really good visit with my mom and dad while we shelled these speckled butter beans. There are still as many beans left on the vine as in the picture. We plan to pick the rest tomorrow and put them in the freezer. Look how beautiful these beans are. There is nothing like growing your own organic vegetables in your garden. GOD IS GOOD!!!
Monday was pretty much a normal day. We started with school, we are doing a Thanksgiving unit study. I will be posting some pictures of a few things we are doing with that. Did some laundry and sorted our herbs we got from Frontier. That's our food co-op with our homeschool group.
We ordered Peppermint leaves for some of our tinctures we are making and decided to make us some tea. Here are the bugs enjoying some of the Peppermint Tea we made Tuesday! We also had a little bible study while we were sipping our tea. I got a book off of Paperbackswap months ago entitled Little Visits With God. We really enjoy this little book. It has a bible verse, a short story pertaining to the verse, questions to ask the children and a prayer at the end to be read aloud. We all take turns reading the prayer.
We also made our homemade laundry detergent this day also. I will post some pictures of us doing that in another post. Some of my friends are wanting to see this and also wanting the recipe.
Wednesday is usually music day but for us this week, we had to cancel. I was not feeling well so we decided to stay home. So instead of doing music, here is what we ended up doing.
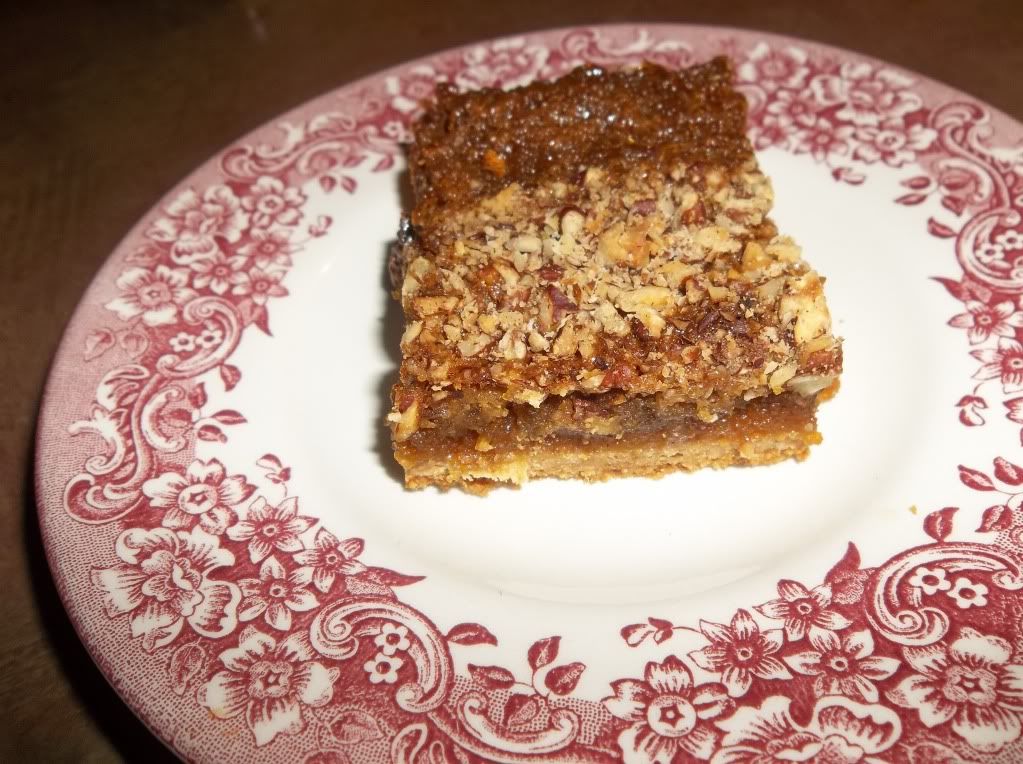
We also made a yummy dessert this afternoon to. Pecan Pie Surprise Bars! These taste just like pecan pie except you make them with a cake mix. How does that sound? Here is the recipe for these delicious bars. I forget where I first came across the recipe for these. Either way, they are FANTASTIC! I replaced some of the ingredients with the things we use around our house to stay as healthy as possible.
PECAN PIE SURPRISE BARS
1 package of yellow cake mix or can use a homemade mix
1/2 cup melted organic butter
4 eggs
1/2 cup firmly packed brown sugar (may use sucanat instead, I have used both and they both work)
1 1/2 cups dark corn syrup ( I used Sorghum molasses instead of the corn syrup)
1 teaspoon vanilla
1 cup chopped pecans
Set aside 2/3 cup of the cake mix. Combine remaining cake mix, melted butter and 1 egg in a large mixing bowl; mix and press out into a 13x9x2 inch baking dish. Bake at 350 degrees for about 15 minutes or until golden brown. Combine the reserved cake mix, 3 eggs, brown sugar, corn syrup and vanilla in a mixing bowl; mix thoroughly. Pour over partially baked crust and sprinkle with the chopped pecans. Bake at 350 degrees for 30 to 35 minutes. Cool and cut into bars.
Well, I guess that's enough about what we did for the last few days. I am sorry this post is so long. I will try to post a little every day instead of one every few days to keep my posts shorter.
GOD BLESS!
Dana
Sunday, November 6, 2011
RECIPES
Here are a few more recipes we do on a regular basis, with the exception of the last one. I haven't ever made these but they sound real yummy and you can cook a whole pot of pinto beans and freeze the ones you don't need in this recipe. Beans to me are a very easy way to save on the grocery bill and in turn, a healthy and frugal option for a large family.
OUR FAVORITE GRANOLA
(You can half the recipe)
12 cups rolled oats
1 cup shredded coconut
1/2 cup powdered milk
1 1/2 tsp. celtic sea salt
1 1/3 cup honey
1 cup whole wheat pastry flour
1 cup sucanat
1 Tablespoon cinnamon
1 cup olive oil or coconut oil
1 Tablespoon vanilla
2 cups nuts of your choice, chopped
2 cups raisins, optional
In a large mixing bowl, combine oats, coconut, flour, powdered milk, cinnamon and salt and mix well. In a saucepan, heat the oil, honey and vanilla until just warm. This helps the mixture pour easily. Pour this over the oat mixture and stir well. Start out by stirring with a large spoon but in the end, mix with hands, as it is hard to get the mixture thoroughly mixed with a spoon. Spread this into a thin layer on about 2 - 3 large cookie sheets and bake in the oven at 300 degrees for about 40-45 minutes, stirring every 15 minutes. When the granola is golden brown, let cool and stir in the nuts and raisins. Store in an air tight container. Makes approximately 20 cups.
MINI BREAKFAST PIZZAS
Homemade pizza dough or store bought
Scrambled eggs
Meat of your choice, bacon, ham, sausage, etc.
Shredded cheddar cheese
Mushrooms, onions, bell peppers or any other toppings, optional
Prepare homemade pizza dough. If you opted for store bought. Remove from packaging. Take dough and divide it into individual pieces and roll out into a circle. It is left up to you on how big you want your pizza to be. After you have your pizza circles rolled out, top with scrambled eggs, meat of your choice, toppings of your choice and shredded cheese. Broil in your oven until cheese has melted and is bubbly. Enjoy!
CLASSIC FRENCH BREAD RECIPE
1 cup plus 2 Tablespoons of warm water
2 teaspoons butter, softened
3 1/4 cups bread flour
1 Tablespoon of sugar
1 1/2 teaspoon salt
1 Tablespoon yeast
We use our Kitchen Aid mixer for this recipe, although you can use it in a bread machine or make it by hand. In your mixing bowl, combine your warm water and yeast and let it proof until bubbly. The add the rest of the ingredients and knead with the dough attachment until it forms a dough ball that pulls away from the sides of the bowl. You can also mix the ingredients and knead by hand for about 5 minutes. Shape the dough into a french loaf shape and let rise. Bake at 375 degrees for about 14 minutes or until golden brown. I found a french loaf pan that works great for this recipe. http://www.amazon.com/Fox-Run-Inch-French-Bread/dp/B001ET5ZBA/ref=sr_1_29?s=kitchen&ie=UTF8&qid=1320646489&sr=1-29
TOASTED BEAN AND CHEESE OPEN-FACED SANDWICHES ("MOLLETES")
I am gonna use my french bread for this recipe instead of the rolls she uses in her recipe.
MENU PLAN
Here is our meal plan for this week. I purchased a new cookbook that I have been wanting for a while. The name of it is Nourishing Traditions.It is wonderful. I have been trying to cook alot healthier for my family. We have tried several recipes out of this book. We try to make kefir on a regular basis and we found a very yummy and healthy kefir smoothie recipe in this book. This week I am using a few of the Nourishing Tradition recipes in our menu plan. I will give the page numbers to the recipes just in case you have one of these awesome books and would like follow along or join me in preparing these recipes.I will also have some of the recipes available in another post. You can get them under RECIPES!

SUNDAY, NOVEMBER 6
Coffee before church
Eating Out!
Snacks (Usually don't serve snacks for supper but we started Christmas play practice and had a long afternoon at church.)
MONDAY, NOVEMBER 7
Mexican Eggs (Heuvos Rancheros) in Nourishing Traditions pg. 438 and cheese omelet for my picky eater
Cheese Quesadillas and Fruit
Chicken & Dumplings, Green Beans and Sweet Potato Casserole
TUESDAY, NOVEMBER 8
Pancakes in Nourishing Traditions Cookbook pg. 478
Leftover Spaghetti and Meat Sauce and Carrot Salad in Nourishing Traditions Cookbook pg. 193
French Onion Soup in Nourishing Traditions pg. 200 (minus the cognac in the recipe)
WEDNESDAY, NOVEMBER 9
Cheese eggs and granola bars that we made yesterday. This will be brunch since today is our music lessons day.
Black Bean Burritos in Nourishing Traditions pg. 430
THURSDAY, NOVEMBER 10
Basic Muffins in Nourishing Traditions Cookbook pg. 482 (Variation: add chocolate chips for my picky eater and add crystallized ginger for the rest of us.) I will make these on Wednesday!
Some kind of sandwich and chips (our grocery day)
Sloppy Joes on homemade hamburger buns (the buns are a recipe I got from a Homestead Blessings DVD entitled "The Art of Breadmaking"http://www.homestead-blessings.com/products.html/) and herb potatoes
FRIDAY, NOVEMBER 11
Mini Breakfast Pizzas
Leftovers
Nachos
SATURDAY, NOVEMBER 12
Coffee and toast
Homemade granola (made from the day before) and Pumpkin Tea Bread (from the pumpkins we got at the Pumpkin Patch)
Toasted Bean & Cheese Open Faced Sandwiches
Saturday, November 5, 2011
I LOVE HERBS!!!!!
I have been studying herbs for a while now. I first started thinking about herbs when our family went to a homeschool convention in Memphis, TN this past March. I had the pleasure of sitting in on a workshop that was to teach us about herbs and ways to use them in our home. A lady by the name of Jessie Hawkins conducted the workshop. She is the founder of Vintage Remedies, http://www.vintageremedies.com/home/, a wonderful resource for anyone wanting to learn a little about herbs or to become a full blown herbalist. In the near future, my plans are to start taking her Family Herbalist course. When we were at the convention, I purchased one of her books entitled "Vintage Remedies for Kids". It is by far one of my favorite books.

It has so many resources in it. I have thoroughly enjoyed every little bit of it. It is written to be able to teach children about healthy and natural living. I am planning on doing a unit study with all my bugs in the spring of 2012. We have already done a few things out of this book. From making our first cheese to making tinctures and Calendula Balm. I will list the recipe for the cheese and the directions on how to make the Calendula balm at the end of this post. I would highly recommend everyone to get this book. Go to her website and look around.
My First Cheese
You'll need:
1 quart organic yogurt
Assorted flavorings (cinnamon and honey / herbs / other small foods or spices)
Cheesecloth
Large strainer
Large bowl
Place the strainer into the bowl. Line with the cheesecloth. Stir the flavorings into the yogurt and pour it into the lined strainer. Leave in the fridge overnight while liquid drips. Remove in the morning, scoop out into a bowl and keep covered in the fridge up to a week.
This cheese is great for morning treats as it is creamy, like cream cheese. It is also made from active cultures in real yogurt, and since it hasn't been heated, they remain in the finished product.
Calendula Balm
Calendula (calendula officinalis) is a bright yellow flowering herb that is also known as marigold. As a medicinal plant, it is prized for its anti-inflammatory properties and ability to stimulate wound healing.
Calendula is a herb to have in your home at all times, as its uses are practically endless. We use it in our home for any kind of bug bite or sting to the treatment of minor scrapes and injuries.
You'll need:
2 ounces of calendula
1 teaspoon beeswax
1/2 cup olive oil
Metal tins
Break apart the herb into small bits. Toss then in the oil in an oven proof bowl and place in a warm oven. Infuse for 2 hours. Remove from the heat and let cool. Once cool, strain the herbs out with cheesecloth. Return to the clean bowl and add the beeswax. Heat until the beeswax is just melted, then pour into clean tins. Label with the ingredients, uses and date of production.
We are planning on making alot of these and giving them as Christmas gifts to our friends and family.
Sorry this post is so long, I get carried away talking about HERBS!
Dana
HOMEMADE HOUSEHOLD GOODIES!
All day today I have been catching up on washing clothes,folding clothes and putting away clothes. I am sure everyone loves to do the same. I realized this morning that we are very, very low on our homemade washing detergent. We usually make this detergent about every two months. We have been making homemade detergent for some time now. The recipe we use came out of the Duggars book entitled "The Duggars: 20 and Counting!" As agreed with the Duggars, this laundry detergent saves a huge amount of money. There are seven of us so, as you can imagine, we have lots and lots of laundry to keep up with.
Not everyone will like homemade laundry detergent as it is a watery gel that produces very low suds. It doesn't have a refreshing smell like the store bought brands but we add essential oils to the finished product to give it a nice, clean smell. We usually use Lemon grass essential oil. We have also in the past used Lemon, Tangerine and Orange oils. The ingredients for this detergent is available in the laundry section at most supermarkets. We have found all of them available at Walmart and Kroger.
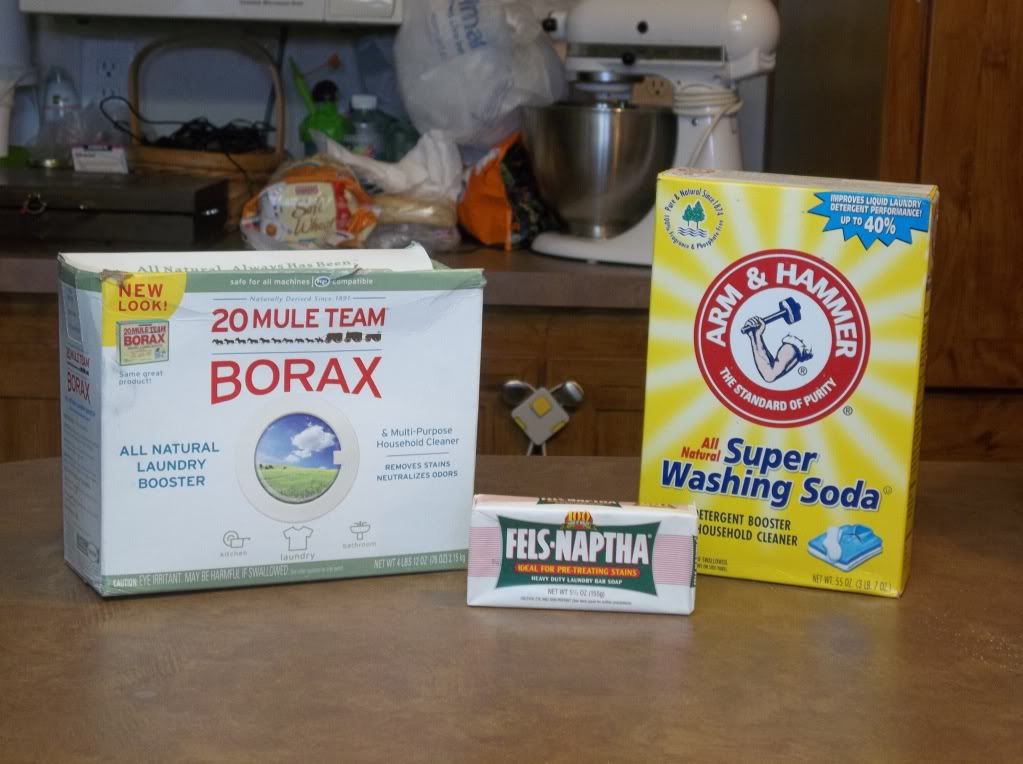
1 Fels Naptha soap bar, grated
1 cup washing soda
1/2 cup borax
Grate the soap into a small saucepan. Cover it with hot water and cook it over medium-low heat, stirring continually, until the soap is completely dissolved.
Put washing soda and borax in a 5-gallon bucket. Pour in the melted, hot soap mixture and stir well, until all the powder is dissolved. Fill the bucket to the top with more hot tap water. Stir and cover securely, and let sit overnight. The next morning, stir the mixture. It will be gel. This will be the time you want to add your essential oils. After stirring the gel mixture, add your oils and stir to combine.
For top-loading machines: Use about a cup of the soap mixture per load.
For front-loading machines: Use about 1/3 cup of the soap mixture per load.
We also make homemade Pre-Wash Spray:
1/2 cup household ammonia
1/4 cup baking soda
1/2 cup white vinegar
1/2 gallon water
Essential oils (optional)
Mix all of the ingredients together and put the mixture into a small spray bottle and spray liberally onto clothes where needed.
Not everyone will like homemade laundry detergent as it is a watery gel that produces very low suds. It doesn't have a refreshing smell like the store bought brands but we add essential oils to the finished product to give it a nice, clean smell. We usually use Lemon grass essential oil. We have also in the past used Lemon, Tangerine and Orange oils. The ingredients for this detergent is available in the laundry section at most supermarkets. We have found all of them available at Walmart and Kroger.
1 Fels Naptha soap bar, grated
1 cup washing soda
1/2 cup borax
Grate the soap into a small saucepan. Cover it with hot water and cook it over medium-low heat, stirring continually, until the soap is completely dissolved.
Put washing soda and borax in a 5-gallon bucket. Pour in the melted, hot soap mixture and stir well, until all the powder is dissolved. Fill the bucket to the top with more hot tap water. Stir and cover securely, and let sit overnight. The next morning, stir the mixture. It will be gel. This will be the time you want to add your essential oils. After stirring the gel mixture, add your oils and stir to combine.
For top-loading machines: Use about a cup of the soap mixture per load.
For front-loading machines: Use about 1/3 cup of the soap mixture per load.
We also make homemade Pre-Wash Spray:
1/2 cup household ammonia
1/4 cup baking soda
1/2 cup white vinegar
1/2 gallon water
Essential oils (optional)
Mix all of the ingredients together and put the mixture into a small spray bottle and spray liberally onto clothes where needed.
Subscribe to:
Posts (Atom)